Showing posts with label CC2. Show all posts

Thursday, August 16, 2012

CC2 - Week 17


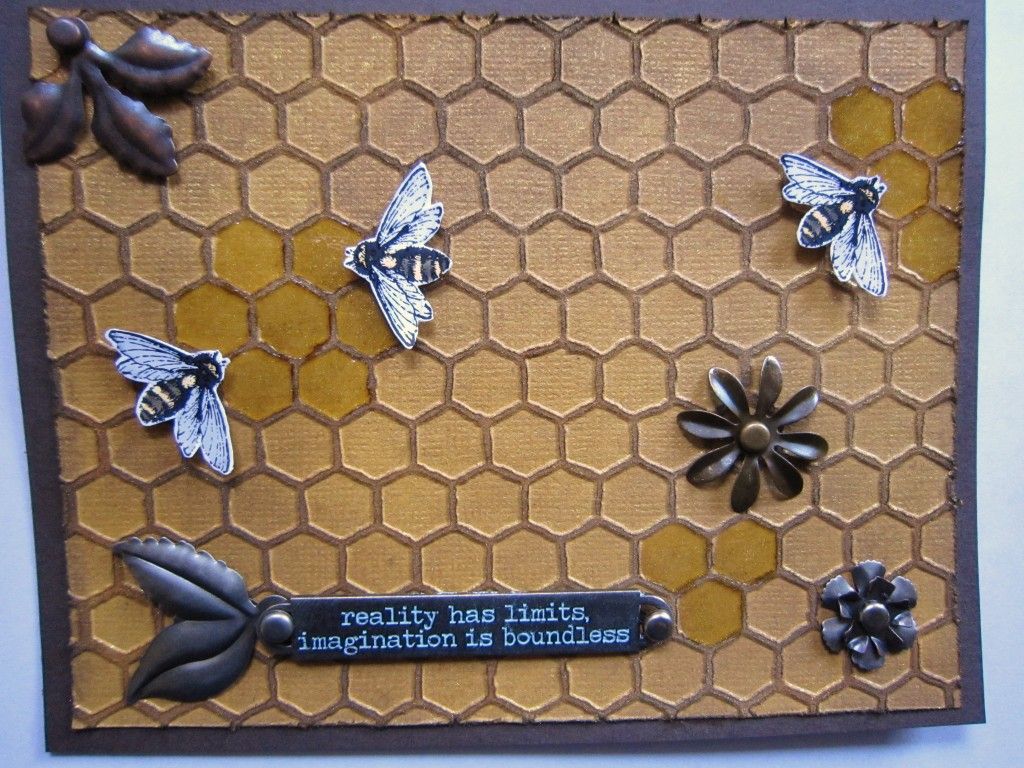
It's Challenge 17 at Studio L3 - and we were challenged to get creative with Core'Dinations paper. The technique is found on page 61 of Tim's book. I love this paper and it is fun to use. Special thanks to Simon Says Stamp for sponsoring this week!!

As always (well, almost) I like to make a card when I craft during these challenges. I have a good friend that I like to send cards to at least once a month, so this one will go to her.

I used some gold Perfect Pearls mist on the cardstock after I embossed and inked it. Then I added some cut-out bees, some trinkets and a wordband, and some Glossy Accents to finish things off.

Summer has been soo busy (bee-zy) and I have some new stuff to play with too--hopefully I can get to some more crafting soon!!

This card will be entered in the Studio L3 CC2 Week 17 Challenge

Sunday, May 27, 2012

CC2 - Week 7


Set sail on the SS Holtz! I really had a lot of fun making my project for the Studio L3 Compendium of Curiosities 2 - Week 7 challenge. Thanks Daisy and the eclectic Paperie for sponsoring this week with a chance to win a $25 gift certificate!

This week's technique, found on page 49 of Tim's book, is called Brushless Watercolor. I used the technique on the ship stamp, with Pumice Stone stain, and then I added some highlights with Black Soot and Chipped Sapphire Distress Markers and a white gel pen.

I made the ship's wheel from Tim's mini cogs die and added a few Vintaj starfish charms to my netting. The netting was made from a mesh bag I picked up at the dollar store and dyed with Walnut Stain Distress Stain. One of Tim's corked vial's worked great for my message in a bottle and I made a few gold coins from embossed grungeboard circles to complete my scene on the beach.

I am entering this in the following challenges:

Wednesday, May 23, 2012

CC2 - Week 6


AAghh! Well, here is my entry for the Compendium of Curiosities Week 6 Challenge. And NO MATTER how I tried (20+ photos) I could not get a decent picture of my work... phooey!

This week's technique, found on page 38 of Tim's book, is called Tissue Wrap Collage. We are lucky enough to have the Funkie Junkie's Boutique as a sponsor this week as well - thanks so much to Linda Coughlin & co. for sponsoring! And Linda at Studio L3 for continuing the fun and all the lovely comments each week!

I used the mini cabinet die to make a window from grungeboard and then followed the technique to complete my window. I was trying for a "looking out the window from a window seat effect"... oh well, there's always next week, LOL.

I had to add some of my extra faux enamel flowers from Tim's May tag, and I made a little terra cotta pot from a wooden one I found at Hobby Lobby (love that store).

I am entering this in the following challenges:


Tuesday, May 15, 2012

CC2 Challenge, Week 5


So this week's challenge over at Studio L3 is from page 48 of Tim's book. It's a technique called "Shattered Stains." And it is one of my favorites!! I really wanted to do something a little different with it this time, though. Whenever I have used this technique in the past, it was with flowers or leaves or hearts--smaller accent-type pieces. This time I thought I would try using it for the entire background.

So... I cut a piece of grungepaper from Tim's tag die and gessoed it first before I added the Rock Candy Crackle Paint. I was a bit impatient, so I dried the gesso AND the Rock Candy. It came out with lots of fine crackle, which was fine with me. I added some Distress Stains and I really like how the door came out looking like an old, weathered peeling door!

This week, the wonderful SimonSaysStamp is sponsoring Linda's challenge--thanks to them and of course, Linda, for another inspiring week!

I am entering this in the following challenges:


Tuesday, April 24, 2012

CC2, Challenge 2


This week's challenge over at Studio L3 is a technique called Faux Patina, and is found on page 58 of Tim's book. This is a fun technique and one of the things  that I like about working with Alcohol Inks is that if you don't like your result, you can start over by "erasing" with blending solution, hehe.

I didn't need to erase anything here, but I have to say I did get dabber happy--just pouncing my inks all over! To my altered timepiece, I added a very appropo sentiment as well as a couple of mini butterflies. Yep, those little black specks are butterflies! I cut them with Tim Holtz's mini butterfly Movers & Shapers die from Ranger's Shrink Plastic, heated 'em up and shrunk 'em down, then colored them black with alcohol ink. So cute and teeny!!

I am entering this tag in the Studio L3: Compendium of Curiosities, Challenge 2.